The Green Button, like Digital Preview discussed last time, won’t be new to long-time Pentax users, but it’s an interesting feature that addresses a larger issue that might not seem immediately apparent. The Green Button sits next to the shutter release on the K10D, and it performs different functions depending on which mode the camera is in. What I want to talk about is the way it functions in “Hyper Manual.”
First, a little background. 35mm cameras from the first Leica onwards have offered a shutter speed dial located near the shutter release, and an aperture ring on the lens. I grew up with this set of controls, starting with the first serious camera I bought back in 1964 (instead of using my Dad’s Speed Graphic and Rolliecord)—a Pentax H3. I moved on to M-Leica and Nikon cameras (F2, F3, F4). When automatic exposure came in with the F3 I experimented with it but found I preferred to stay with manual exposure. Same with the F4. My most recent Leicas are M6s which have a meter, but no automation, which is fine with me. With the “analog controls” of shutter dial and aperture ring, you can keep a tactile connection to the settings as you wander around, constantly adjusting for ambient light conditions almost as a reflex, often without even looking at the camera. Your hands learn how to open up two stops as you move from sun to shade. I wrote about this in an article for Photo Techniques magazine called “The Leica Mystique” back in 1995 that you can still get as a back issue.
When I first got a good DSLR camera, in 2004, I quickly found that manual exposure had become completely non-intuitive. The control was there, at least in theory, but you had to use two blank, unmarked control wheels that have no endpoints to their travel. The only way to know what you’ve adjusted is to look at tiny digital readouts of speed and f-stop on the top plate LCD or in the finder. It just isn’t the same. In fact, as far as I’m concerned, it just doesn’t work—except for controlled situations like studio lighting or tripod shooting. I decided I would have to learn to work in automatic modes, usually aperture priority or full program, with the camera’s custom menu set so that I could override the automatic exposure just by moving a control wheel, without having to hold down a second button.
After a few thousand exposures and analysis of them, I got pretty good at guessing when the camera would need to have exposure compensation dialed in with the front control wheel, or when the program should be shifted to favor fast shutter or deeper depth of field with the rear control wheel. I still missed manual exposure, though. In a situation with a long tonal range, if you want to make a number of slight variations in framing, using auto-with-override is a real pain because you may have to change the amount of override each time you tweak the framing.
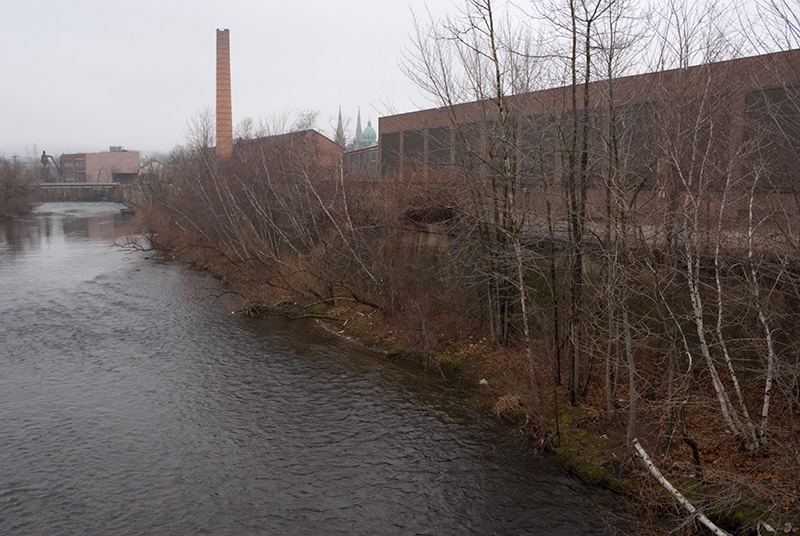 The Naugatuck River, Waterbury, Connecticut, 1/14/07
(If the camera is set in any mode of automatic exposure, a different amount of override will be needed for even the slightest change in framing a picture like this. Here, –2/3 stop worked. But it would be easier to set a manual exposure that just holds the sky values. Then the framing could be changed at will without bothering about the exposure.)
Increasing a bright sky area from 15% of the frame to 20% can require 2/3 stop change in the override. If the camera had been set to a correct manual exposure in the first place (the most exposure that retains tone in the sky), you could change the framing all over and keep shooting at that correct exposure.
This is where the Green Button comes in. With the K10D in manual, it works as awkwardly as any other dual-control-wheel DSLR manual exposure system, until you invoke the magic green button. If you point at a possible picture and hit the Green Button, the camera momentarily reverts to Program mode and sets the shutter and f-stop as it would in program. Then it lets go and you have full control with the rear wheel running the f/stop and the front wheel running the shutter speed. (For some reason this is still counter-intuitive to me, though the Olympus E-1 I’ve used for several years also sets the wheels this way in manual. If I had my way I’d have the front wheel do the aperture and the rear wheel do the shutter.) Now, instead of overriding auto exposure for a particular framing, you dial in some up and down marks on the in-finder exposure scale to set an absolute exposure for this particular scene. If there’s time, use the Digital Previw to get RGB histograms to review, tweak as needed, then go ahead and shoot any framing changes you want without constantly fiddling to compensate for whatever error the automation would introduce with each new framing.
This is seriously cool. I don’t think it’s as good a manual system as classic shutter speed and f-stop controls, but it’s a really imaginative workaround that I’m finding quite useful.
Posted by: CARL WEESE
Carl's Pentax K10D Thought Process to Date:
Part I: "On Buying a Camera"
Part II: "Less is More"
Part III: "On Testing a New (Digital) Camera, Steps A and B"
Part IV: "Weese on Anti-Shake"
Part V: "Anti-Shake Pt. II, or, Shake Reduction as Virtual Tripod for Nature Work"
Part VI: "The Camera-Manual Easter Egg Hunt: Pentax Digital Preview"
Part VII: "To Delete or Not, That is the Question..."
No comments:
Post a Comment